Hello! Welcome to a new Logolitic tutorial. In this tutorial you will learn how to make a realistic vector printer in Adobe Illustrator.
As you can see I didn`t need to explain too complex because the images contain all you need to know! Images speaks from themselfs.
The result Image:
Let`s start!
Step 1:
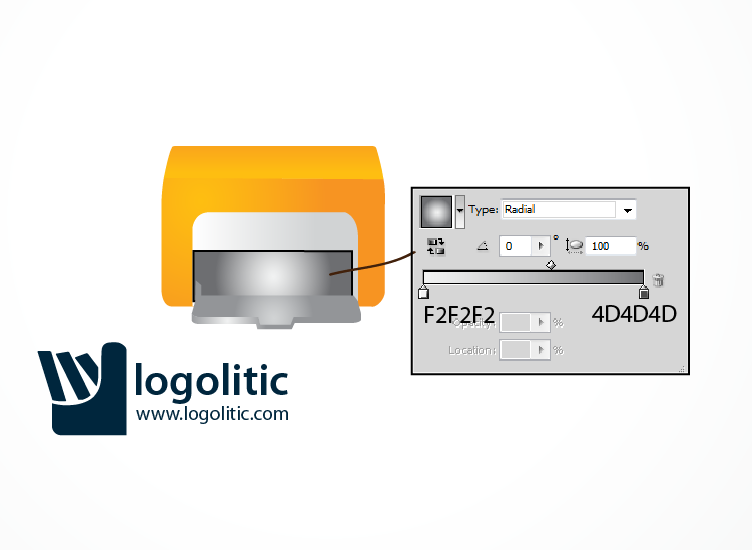
First thing you have to do is to make a a square using Rounded Rectangle Tool. Now select Pen Tool and make over the square a shape looking like the yellow one in the next image. It don`t needs to be perfect, just to give the impresion of “3D”.

Now fill them with the following gradients:
Step 2:
Make a new square using the same tool: Rounded Rectangle tool over the gradiented one. Now over the “orange gradiented” square do a line and bring it to front. Select the line and the yellow square and trim them. You will get something like this:
Fill the square with the following gradient:
OBS: I made stroke just to see it better, you don`t need to do it
Step 3:
Using Pen Tool draw the following shape that will be the support of the files:
Fill it with the following gradient:
Step 4:
Under the support, using the same tool: PenTool make the 3D look of the support:
Add the following gradient:
Step 5:
Make a square using Rectangle Tool like I did in the next image:
Add the following gradient:
Step 6:
On this step we are going to make the files. Using Pen Tool make a file shape like I did in the next image.
Add the following gradient:
Duplicate the file did earlier, select Free Transform Tool and holding CTRL+SHIFT drag to the right.
Add the same gradient to the files. Now using Pen Tool make the file shadow. Draw arround the file a shape ( like a stroke but not quite a stroke) and apply the next effects:
Repeat the process and drag the files one to right, one to left etc. You will get something like that:
Using Pen Tool make under the last file a shape that will be the shadow of the files. It`s like you are going to do the stroke of the files on the support. Apply the next effects:
Now you will make the shadow of the files on the right wall of the printer interior. Fill it with a darker gray.
To make the wall of the printer interior looking more realistic, draw using Pen Tool a shape like I did in the next image:
Apply the next gradient:
Now we have to make the left wall looks more realistic too! Draw a shape using Pen Tool and fill it with a darker gray, This will be the shadow of the left wall of the printer exterior.
Step 7:
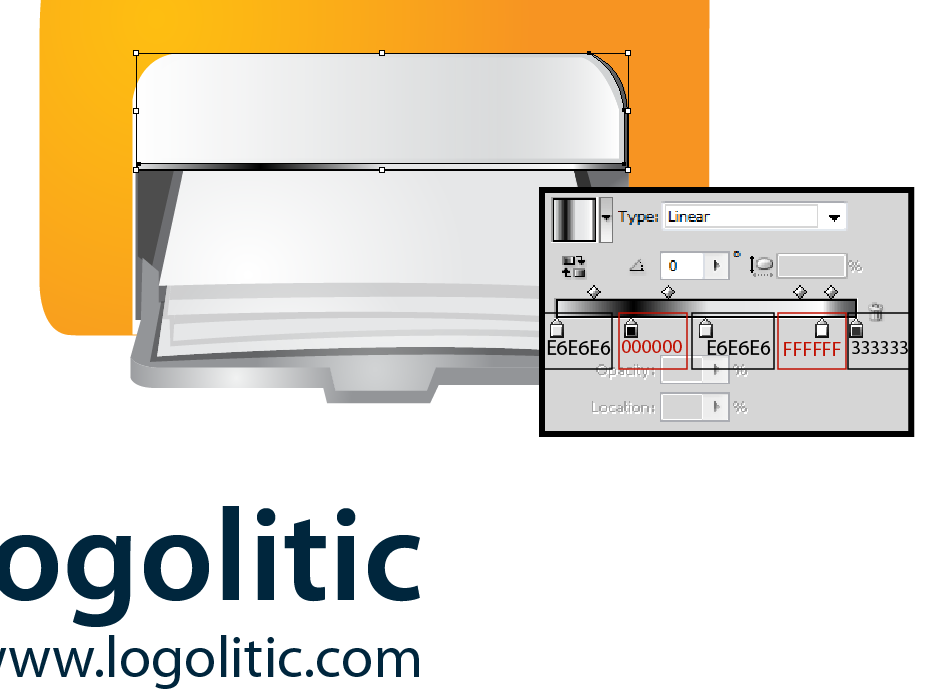
Using Pen Tool make a rectangle over the printer. This will be the top side of the printer.
Add the following gradient:
Step 8:
Make sure that the square in the previously step is centred. Now in the center of the square make a sharped shape as I did in the next image:
Step 9:
Using Rectangle Tool make inside the previously shape (using like corners the sharped lines of the shape) like in the next image:
Add the following gradient:
Over the sharped shape make a thin line using Pen Tool. It will give the impression of hole, interior.
Add the following gradient:
Step 10:
In this step we will make the files on top. Make using Pen Tool a file shape looking like that:
Add the following gradient:
Duplicate the file, make it smaller (from up to down) and use the bottom files method.
Repeat the process until you will have 3-4 files:
Step 11:
Make the shadow of the top side and reduce the opacity to 15%
Step 12:
In the left side of the files, make a shadow as I did in the next image, and apply the following effects
Step 13:
Make shadow of the files using Pen Tool and apply the following effects:
Step 14:
Add an effect to the white square like I did in the next image and apply the following effects:
Step 15:
Now let`s add some light effects on the both sides of the printer. Using Pen Tool draw a shape like I did in the next image and add the following effects:
Step 16:
Now make 2 shadow shapes to give the impression of “hole” and apply the next effects:
Step 17:
Make in the left side of the printed a shape using Pen Tool and apply the following color. Duplicate it and put it to the right side too.
Step 18:
On the front side of the printer, draw a shape using Pen Tool, fill it with white, duplicate it apply a Black&White gradient, radial coming from top and add layer mask. If you don`t know how to add a layer mask you can see a Layer Mask tutorial HERE :
Step 19:
Use the same method, the layer mask one, on a new shape made using Pen Tool on the top of the printer like in the next image:
Step 20:
Using Pen Tool make a thin line arround the top square and apply the next gradient:
Step 21:
Make another line arround the same square and apply the same gradient like I did in the next image:
That`s it !
The result Image:
Waiting for your comments regarding this tutorial.
Looking for rental properties try Alameda real estate agent.


 5263
5263 2074
2074 1147
1147


Very detailed print!! nice work …final result seems pretty good, keep going m8!!